Wednesday, January 2, 2013

Curio Makeover

Well, thanks to my husband, who spilled a glass of water on my side curio table and didn't tell me, it now needed a makeover.

Before and After:


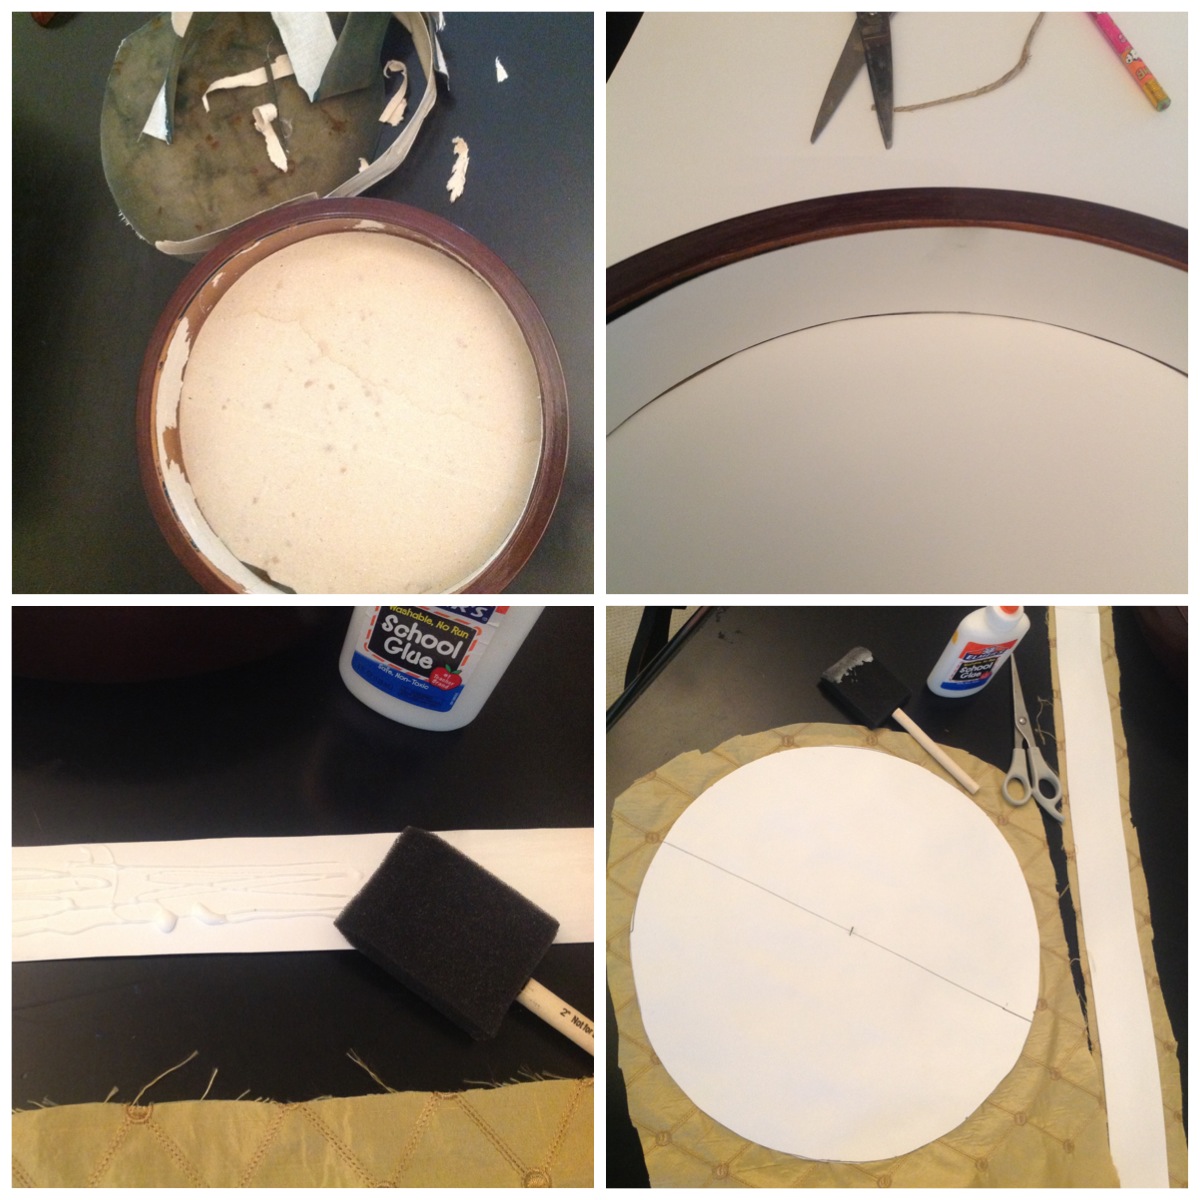
I started by ripping out the old velvet.  I  pulled out as much of the backing as I could, but left what was strongly attached.  I measured the height of the inside of the curio and cut a piece of poster board to that size.  Next, I measured the diameter of the circle and then googled how to cut a circle.  It ended up to be extremely quick and easy. Here is the link:


I glued a scrap piece of fabric to both pieces of poster board that I had cut.  After the glue was dry, I cut around the edges.  I covered the inside of the curio with glue and put the fabric-covered poster board in the curio.  I wanted the fabric to be slightly stiff, so I covered everything with Elmer's glue.  I quit using Mod Podge years ago and just use Elmer's, the effect is the same.  Once the glue had dried, I didn't like how the edge looked where the side strip met the bottom circle, so I ran to the fabric store and bought 2 yards of cord.  I hot glued the cord in the corner and I was done!  

The table looks so pretty now, I'm not sure that I'll put my key collection back in it.  They are a little rusty now from the water anyway... :)

Total cost: $7.98 for the cord.

Tuesday, January 1, 2013

Cottage Picture Holder

The perfect way to easily change photos!  

I bought an empty frame at a garage sale for $1, purchased mini clothes pins, gathered twine, foam board, and a material scrap from items I already had.

I cut the foam board to fit into the frame, covered the foam board with material and attached with dots of hot glue.  Then, before I put the material-covered foam board in the frame, I measured the inside height and divided by how many strings of twine I wanted in the frame.  I attached the twine inside the frame with dots of hot glue.  After the foam board was inside the frame, I clipped the mini clothes pins on the twine.  

Done!  


Total cost:  $4

Bulletin Board Makeover

Our bulletin board was in desperate need 
of a makeover!
I gathered a few items and got to work.  

Before:


I had a $5 broken garage sale frame, some leftover fabric from when I covered my dining room chairs, and a medallion that was hanging on my bedroom wall, but never really looked like it fit in with the rest of the room.

First, I removed the cork from the original frame and threw the rest of the old bulletin board in the trash.  I cut the cork board to the size of the new frame.  Then, I used a little hot glue to attach the fabric to the back of the frame to keep it from moving.  I placed the covered cork board in the frame and it was a snug fit since I had cut it to the exact size, I didn't need to use any hardware to keep it in the frame.  Lastly, I hot glued the medallion over the broken part of the frame. 


After:


I love it!  
The total cost was the $5 frame 
and less than two hours of my time. :)

Monday, December 31, 2012

Family Platter

Before my daughter left for college, we made a family plate.  We each put our hand print in our favorite color, then wrote our own words next to our hand print.  In the center we added the date. 
  • "There is nothing more important than family." Dad
  • "I will always love you, no matter what."  Mom
  • "The best things in life aren't things." Ameena, 17
  • "Huuuugs" Charlie, 6